

Today I wanted to share with you a simple project to make yourself a scrap journal booklet made with common household items. In the past few years, I have gotten into bookbinding, and this is a wonderful project for beginners. There are only a handful of materials needed for this project, and it should take about an hour or less to complete.
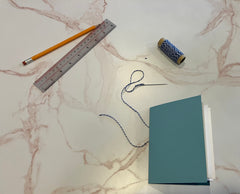
Materials Needed:

- Paper
- String
- Needle
- Pencil
- Scissors
- Straight edge (Ruler)
Optional:
- Stickers
- Fun paper
- Towel
First, I'm going to walk you through some of the materials and give you some options to choose from. This is a very adaptable project, and most materials can be adjusted for what you have on hand.
- For paper I used half sheets of paper folded in half. I used computer paper for my inner sleeves and a piece of thicker colored paper for the cover. The thicker the paper, the more difficult it is to fold and poke with a needle, so I would only use 2-3 sheets of thicker paper. The optional fun paper I used were smaller pieces of scrapbook paper. You could also use paper ephemera you have around the house. Paper ephemera refers to minor documents of everyday life that are usually used and then discarded; this includes things such as labels, ticket stubs, post cards, and advertisements.
- The string used is also a very adjustable material. In this example, I am using a small bit of colored twine. Some other good options could be embroidery floss, thinner yarns, or thicker thread. I would advise against most common sewing threads, as it tends to be a little weak to hold together all of the paper. If this is all you have available, I would suggest doubling or tripling the thread to give it a stronger weight.
- I found using a regular sewing needle to be a very doable option to both poke the holes and thread the string. For traditional bookbinding, an awl is used. Any small sharp object can be used to puncture the pages though.
Once you've gathered all of your materials, have a seat at a table and let's begin!


Step 1: Fold your 3 sheets of paper and cover in half. Rub or press the folded edge to make sure it's a good crease.
Step 2: With your ruler, or straight edge, mark three dots in the center with your pencil about 1 inch apart. No need to stress about getting exact measurements. Optionally, you can mark your 3 dots on a scrap piece of paper. I did this to use on my ephemera that is smaller and doesn't need to be exact center.
Step 3: Take your needle, or sharp object, and poke through all layers of the paper. Depending on the surface, you may want to add padding or fabric underneath, so you don't damage your workspace.


Optional Step: Fold your Fun Paper. It doesn't have to be exactly in half. Use your ruler to mark the holes and punch through. If the piece is smaller, you may only punch two holes, like in the right photo above. As shown in the photos below, tuck your fun paper in between your sheets of folded paper, take care to keep the holes you punched line up. If it's not exact, don't worry. When we thread the needle through, it'll help hold them where they need to be.


Step 4: Cut the String you're using to about 12-16 inches. You can trim off any extra when done. Do NOT tie a not in the end of your string, as you will not be pulling it all the way through. Thread your needle and then insert it into the middle hole that was punched. You're going to poke the needle from the outside into the book (So your needle should go through the cover first and then through your sheets of paper). Do NOT pull all the way through. Leave about 2 inches outside the cover like in the right photo below.
*Depending on the thickness of the paper and the amount of paper used, it may be a little difficult to push or pull the needle through. Take your time and don't be afraid to wiggle the needle through one sheet at a time until it's through them all.


Step 5: Thread the needle from the middle of the book into the hole poked above it and pull it back to the outside of the book. When done, it should look like the left photo below.
Step 6: Thread the needle from the outside top hole down to the bottom hole. Pull the needle through into the center of your book. At the end it should look like the right photo below.

Step 7: Take the needle and push it from the inside to the outside through the center hole again (Left photo below). Once all the way through, you can remove the needle. Tug the string so that it is snug and not loose. Tug gently so as not to tear the paper. Both ends should be on the outside and through the center hole. Make sure each end is on either side of the long string between top hole and bottom hole. Tie a knot and then a bow (Right photo below)


Step 8: Your little booklet is complete! Now you have the option to trim and decorate. In the left photo below my inside paper sticks out past my cover; feel free to trim it a little if that is your preference. You can use scrapbook scissors, regular scissors, or carefully tear the edge. You may also draw or use stickers to decorate the cover.


I hope you've enjoyed making this little booklet. It's an incredibly fun project that does not take too much time or effort or supplies. I find it to be a great project for people who want to make simple homemade books and can be a great beginner project for anyone who may want to start exploring bookbinding as a craft!
Let us know how your project goes if you make it at home! Tag @crafttheorylakewood or #crafttheorylakewood on socials so we can see your work!